Niela Udunwa

Deploy sock-shop micro-services application on Kubernetes Using Terraform and Jenkins
Where do I start from?
HOW TO DEPLOY SAMPLE APPS ON EKS USING TERRAFORM AND JENKINS ON A LINUX SERVER.
For the the purpose of this, we will be using the following tools:
Terraform
Git
Jenkis
Prometheus
Grafana
EKS
Now we have got that aside, lets delve into the work.
PREREQUISITES
AWS Account
IAM credentials
AWS CLi
Ubuntu20.4 with at least 2GB RAM
Navigate into your server Run the following commands
sudo apt update
sudo apt install net-tools
This is just to ensure the apt package is upto date.
Install AWS CLI and configure your credentials. follow this link to install AWS CLI https://docs.aws.amazon.com/cli/latest/userguide/cli-chap-getting-started.html
To configure your account:
aws configure
Input your access key and secret key, also input your region. You can leave the output format empty or input any of your choice such as yaml. The default output is json.
When that is done, you need to install the following using the links attached.
Docker: https://docs.docker.com/engine/install/ubuntu/
Terraform: https://developer.hashicorp.com/terraform/tutorials/aws-get-started/install-cli
kubectl: https://docs.aws.amazon.com/eks/latest/userguide/install-kubectl.html
eksctl: https://docs.aws.amazon.com/eks/latest/userguide/eksctl.html
Good! you are ready to continue.
Lets write our terraform scripts. terraform is saved with .tf
start by creating a folder, give it any of your choice.
mkdir Terraform
cd Terraform
In this folder create a file create a cluster.tf file. Don't forget, you can use any choice name.
resource "aws_eks_cluster" "nielclust" {
  name               = var.clustern
  role_arn           = aws_iam_role.nielclust.arn

  vpc_config {
    subnet_ids       = var.subnetsid
 }


depends_on = [
    aws_iam_role_policy_attachment.nielclust-AmazonEKSClusterPolicy,
    aws_iam_role_policy_attachment.nielclust-AmazonEKSVPCResourceCont>
  ]
}


locals {
  cluster_name = "nielclust"
}

resource "local_file" "nfile" {
  content  = "resource.aws_eks_cluster.nielclust"
  filename = "nfile_${local.nielclust}"
}
In the above content, I have specified that I want to build node within the cluster named "nielclust". i have also specified how many nodes I want in the scaling config and roles with permission it will use to create them.
Next, create the roles and assign permission in the roles.tf file.
resource "aws_iam_role" "nielnode" {
  name = "eks-node-group-nielnode"

  assume_role_policy = jsonencode({
    Statement = [{
      Action = "sts:AssumeRole"
      Effect = "Allow"
      Principal = {
        Service = "ec2.amazonaws.com"
      }
    }]
    Version = "2012-10-17"
  })
}

resource "aws_iam_role_policy_attachment" "nielnode-AmazonEKSWorkerNodePolicy" {
  policy_arn = "arn:aws:iam::aws:policy/AmazonEKSWorkerNodePolicy"
  role       = aws_iam_role.nielnode.name
}

resource "aws_iam_role_policy_attachment" "nielnode-AmazonEKS_CNI_Policy" {
  policy_arn = "arn:aws:iam::aws:policy/AmazonEKS_CNI_Policy"
  role       = aws_iam_role.nielnode.name
}

resource "aws_iam_role_policy_attachment" "nielnode-AmazonEC2ContainerRegistryReadOnly" {
  policy_arn = "arn:aws:iam::aws:policy/AmazonEC2ContainerRegistryReadOnly"
  role       = aws_iam_role.nielnode.name

}


#Cluster Iam role
resource "aws_iam_role" "nielclust" {
  name = "eks-cluster-role-nielclust"
  assume_role_policy = jsonencode({
    Version = "2012-10-17"
    Statement = [{
      Action = "sts:AssumeRole"
      Effect = "Allow"
      Principal = {
        Service = "eks.amazonaws.com"
      }
    }]
  })
}


resource "aws_iam_role_policy_attachment" "nielclust-AmazonEKSClusterPolicy" {
  policy_arn = "arn:aws:iam::aws:policy/AmazonEKSClusterPolicy"
  role       = aws_iam_role.nielclust.name
}


resource "aws_iam_role_policy_attachment" "nielclust-AmazonEKSVPCResourceController" {
  policy_arn = "arn:aws:iam::aws:policy/AmazonEKSVPCResourceController"
  role       = aws_iam_role.nielclust.name
}
Now create the output.tf file
output "endpoint" {
  value = aws_eks_cluster.nielclust.endpoint
}

output "kubeconfig-certificate-authority-data" {
  value = aws_eks_cluster.nielclust.certificate_authority[0].data
}


output "region" {
  description = "AWS region"
  value       = var.region
}

output "cluster_name" {
  description = "Kubernetes Cluster Name"
  value       = var.clustern
}
Define your variables in vaws.tf
variable "region" {
  default     = "us-east-1"
  type        = string
  description = "Us Virginia region"
}


variable "nodem" {
  default      = "nielnode"
  type         = string
  description  = "Node group name"
}


variable "noden" {
  default      = "nielnome"
  type         = string
  description  = "Node name"
}


variable "clustern" {
  default      = "nielclust"
  type         = string
  description  = "Cluster name"
 }


#variable "rolea" {
 # default       = arn:aws:iam::960289794094:user/NielIAM
  #type          = string
  #description   = "IAM role"
#}


variable "itype" {
  default     = "t2.large"
  type        = string
  description = "Instance type"
}

variable "subnetid" {
  default     = "subnet-05a5ac25f5ce42bd2"
  type        = string
  description = "subnet id"
}

variable "subnetsid" {
  default     = ["subnet-05a5ac25f5ce42bd2", "subnet-0e374a25aaacb370f"]
  type        = set(string)
  description = "subnets"
}

variable "sgroupid" {
  default     = ["sg-0a8a17b9edda64ad0", "sg-0678923d9d25cdcaf"]
  type        = set(string)
  description = "Security group"
}

variable "vpc" {
  default     = "vpc-00f46ffdfcab93bc7"
  type        = string
  description = "V private connection"
}

variable "publicip" {
  default     = "true"
  type        = bool
  description = "Assign public IP"
}

variable "zoneid" {
  default     = "Z02621071S6O059G8O7XI"
  type        = string
  description = "hosted zone id"
}

variable "zonename" {
  default     = "domain.aws_lb.nielb.dns_name"
  type        = string
  description = "hosted zone name"
}

variable "domain" {
  default     = "nielaudunwa.me"
  type        = string
  description = "domain name"
}


variable "alb_name" {
  default     = "nielb"
  type        = string
  description = "Load balancer name"
}

variable "alb_arn" {
  default     = "aws_lb.nielb.arn"
  type        = string
  description = "alb arn"
}

variable "availzone" {
  default     = ["use1-az1", "use1-az2", "use1-az3", "use1-az4"]
  type        = set(string)
  description = "availability zones"
}
create providers.tf
terraform {
   required_providers {
    aws = {
      source  = "hashicorp/aws"
      version = ">=4.52.0"
    }
   }
}

provider "aws" {
  profile = "default"
  region  = "us-east-1"
}


provider "helm" {
  kubernetes {
    host                   = data.aws_eks_cluster.cluster.endpoint
    cluster_ca_certificate = base64decode(data.aws_eks_cluster.cluster.certificate_authority.0.data)
    exec {
      api_version = "client.authentication.k8s.io/v1beta1"
      args        = ["eks", "get-token", "--cluster-name", data.aws_eks_cluster.nielclust.name]
      command     = "aws"
    }
  }
}

provider "kubernetes" {
  host                   = data.aws_eks_cluster.cluster.endpoint
  cluster_ca_certificate = base64decode(data.aws_eks_cluster.cluster.certificate_authority.0.data)
  token                  = data.aws_eks_cluster_auth.nielclust.token
}
Now run the following:
terraform init
terraform plan

terraform applyThis will provision your cluster and nodes. thos takes 10 - 20 mins, chill and rest your fingers.
When that is done clean up with
terraform destroy
Now create your jenkins folder outside of the terraform folder.
Mkdir Jenkins cd Jenkins
create the following files.tf for ypur jenkins instance main.tf
resource "aws_instance" "nieljins" {
# name                        = "nieljins"
  ami                         = var.ami
  instance_type               = var.itype
  subnet_id                   = var.subnetid
  security_groups             = var.sgroupid
  associate_public_ip_address = var.publicip
  key_name                    = var.keypair
  user_data                   = file ("jeniscript.sh")
}
vaws.tf You can use the same variable file from the one created in the terraform folder.
providers.tf Can use the same thing also
output "public_ip" {
  description = "IP of EC2 instance"
  value = aws_instance.nieljins.public_ip
}

output "region" {
  description = "AWS region"
  value       = var.region
}
Create ypur bash script for the user data.
#! /bin/bash
sudo apt update

# Install Java SDK 11
sudo apt install -y default-jdk
sudo apt install -y default-jre

#Install Jenkins
wget -q -O - https://pkg.jenkins.io/debian-stable/jenkins.io.key | sudo apt-key add -
sudo sh -c 'echo deb http://pkg.jenkins.io/debian-stable binary/ > /etc/apt/sources.list.d/jenkins.list'
sudo apt update
sudo apt install -y jenkins
sudo apt install -y jenkins
sudo systemctl start jenkins
sudo systemctl enable jenkins


#Install docker engine
sudo apt-get remove docker docker-engine docker.io containerd runc
sudo apt-get update
sudo apt-get install \
    ca-certificates \
    curl \
    gnupg \
    lsb-release
sudo mkdir -m 0755 -p /etc/apt/keyrings
curl -fsSL https://download.docker.com/linux/ubuntu/gpg | sudo gpg --dearmor -o /etc/apt/keyrings/docker.gpg
echo \
  "deb [arch=$(dpkg --print-architecture) signed-by=/etc/apt/keyrings/docker.gpg] https://download.docker.com/linux/ubuntu \
  $(lsb_release -cs) stable" | sudo tee /etc/apt/sources.list.d/docker.list > /dev/null
sudo apt-get update
sudo apt-get install docker-ce docker-ce-cli containerd.io docker-buildx-plugin docker-compose-plugin


#Install terraform
sudo wget -O- https://apt.releases.hashicorp.com/gpg | gpg --dearmor | sudo tee /usr/share/keyrings/hashicorp-archive-keyring.gpg
echo "deb [signed-by=/usr/share/keyrings/hashicorp-archive-keyring.gpg] https://apt.releases.hashicorp.com $(lsb_release -cs) main" | sudo tee /etc/apt/sources.list.d/hashicorp.list
sudo apt update && sudo apt install terraform


#Install kubectl
sudo curl -O https://s3.us-west-2.amazonaws.com/amazon-eks/1.25.6/2023-01-30/bin/linux/amd64/kubectl
sudo chmod +x ./kubectl
sudo mkdir -p $HOME/bin && cp ./kubectl $HOME/bin/kubectl && export PATH=$PATH:$HOME/bin
echo 'export PATH=$PATH:$HOME/bin' >> ~/.bashrc


#install eksctl
curl --silent --location "https://github.com/weaveworks/eksctl/releases/latest/download/eksctl_$(uname -s)_amd64.tar.gz" | tar xz -C /tmp
sudo mv /tmp/eksctl /usr/local/bin


#install git
sudo apt update
sudo apt install git
Now run the following:
terraform initThis will initialize terraform and create state files
terraform planThis will check your script for errors
terraform apply

This will provision an instance.
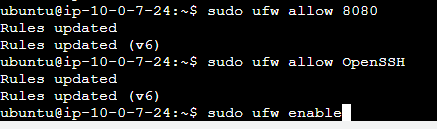
Connect to the newly created instance, copy the ip and paste on your browser
your_ip_address:8080
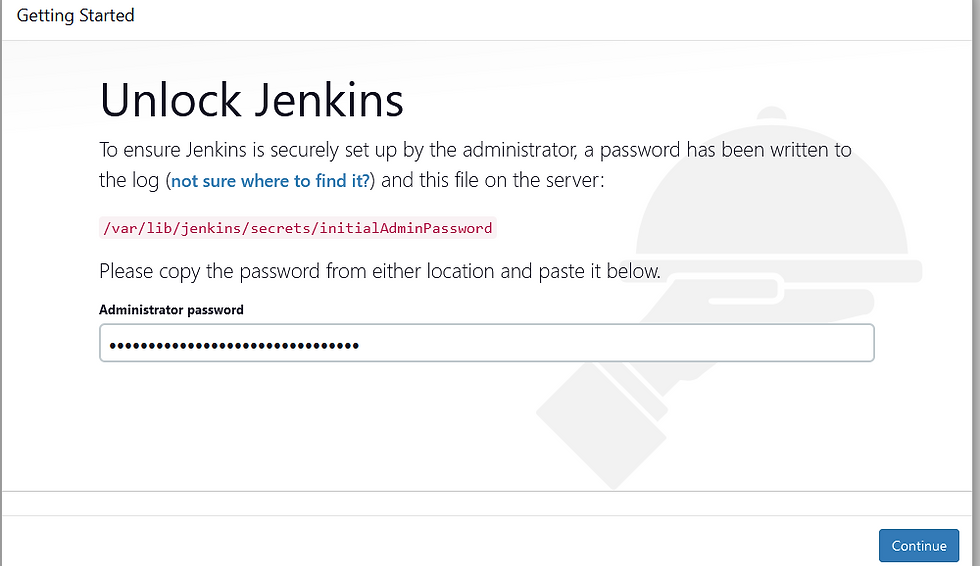
This will bring up the jenkins unlock screen

sudo cat /var/lib/jenkins/secrets/initialAdminPasswordPaste content of file in password field and click continue.
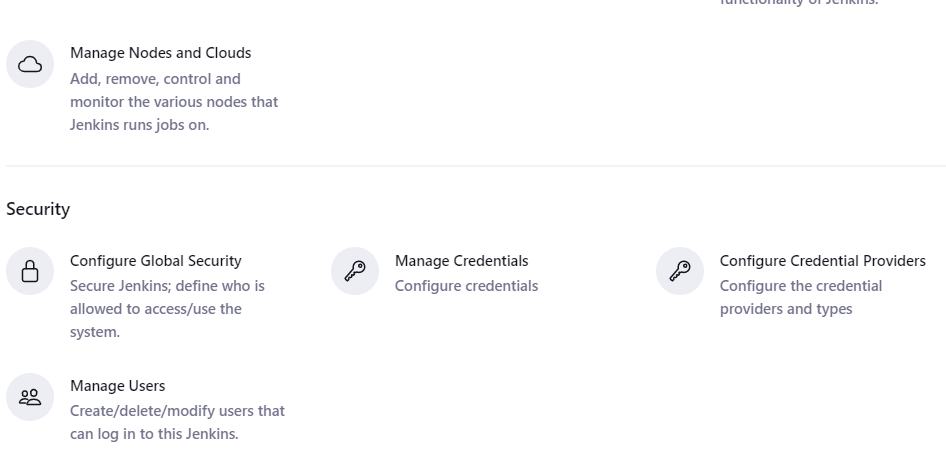
the next step is to install plugins

Once the plugins are installed, go to manage credentials
Click on system
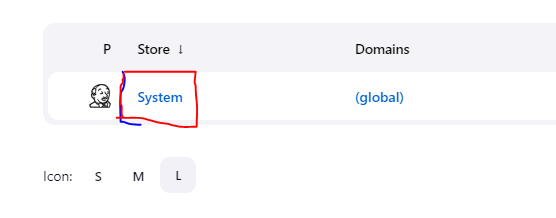
Click on global credentials and add ypur credentials
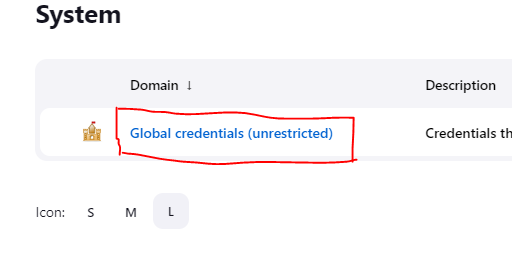
The output of your credentials when save should look like this. Pay special attention to the "kind" of credentials being created.

When that is done, navigate to your dasboards and create a pipeline.
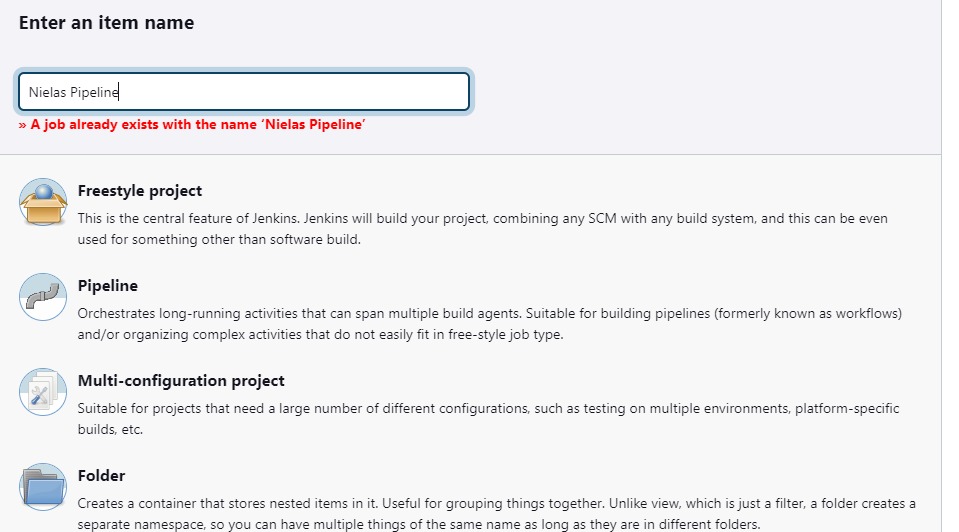
Input the name of you want to give your pipeline, select pipeline from the list and click on ok.
Now, you have to have your Jenkisfile written and stored in root directory of your repo. This script tells Jenkins the process to follow and what to do. The script should look like is:
pipeline {
    agent any
    environment {
        AWS_ACCESS_KEY_ID = credentials('AWS_ACCESS_KEY_ID')
        AWS_SECRET_ACCESS_KEY = credentials('AWS_SECRET_ACCESS_KEY')
        AWS_DEFAULT_REGION = "us-east-1"
    }
    stages {
        stage("Bring up my cluster") {
            steps {
                script {
                    dir('Terraform') {
                        sh "terraform init"
                        sh "terraform apply -auto-approve"
                    }
                }
            }
        }
        stage("Run the sock shop application app") {
            steps {
                script {
                    dir('demo') {
                        sh "aws eks update-kubeconfig --region us-east-1 --name nielclust"
                        sh "kubectl apply -f complete-demo.yaml"
                        sh "kubectl apply -f manifests-monitoring"
                        sh "kubectl get deployment -n sock-shop"
                        sh "kubectl get svc -n sock-shop"
                        sh "kubectl get deployment -n monitoring"
                        sh "kubectl get svc -n monitoring"
                    }
                }
            }
        }
            stage("Run my web app") {
                steps {
                    script {
                        sh "aws eks update-kubeconfig --region us-east-1 --name nielclust"
                        sh "kubectl apply -f nielsweb.yaml"
                        sh "kubectl get deployment -n nweb"
                        sh "kubectl get svc -n nweb"
                    }
                }
            }
        }
    }
Navigate back to your jenkins and click on "build now". This will locate the Jenkinsfile and run it. You will see the view below

When the contents of the script has been deployed / setup, you should receive an output.

Its very okay to run into errors, always read the log files or error message to get a better understanding of any issue.
The console output shows the load balancer attached to each service;


Navigate to the front-end url and confirm the application is being displayed;

Snapshots of my cluster and co


Project Gallery